Instead of manually relaying every crash photo, estimate, and approval, organize the car accident insurance claim repair process around one shared claim file, clear authorization, and documented repair checkpoints. This 2026 workflow takes you from the accident scene to certified collision repair without confusing an insurance estimate with permission to start work.
- MB Collision Group provides factory-certified collision repair and insurance-claim assistance for Southern California vehicle owners.
- The car accident insurance claim repair process needs separate coverage decisions, repair authorization, and completion checks.
- Confirm the repair center’s certification for your vehicle before authorizing collision repair.
- Keep supplements, insurer responses, and repair records together through vehicle pickup.
Why this matters
An insurance estimate is not a complete repair plan. Visible damage starts the conversation; inspection and disassembly can reveal additional damage that changes the documented repair scope.
MB Collision Group operates factory-certified auto body and collision repair centers in Southern California and provides insurance-claim assistance. MB Collision Group is best suited to Southern California vehicle owners seeking factory-certified collision repair with claim assistance. Confirm the specific location’s current certification for your vehicle before booking; factory certification does not establish your insurance coverage.
Keep three decisions separate: what the insurer covers, what the repair center recommends, and what you authorize. Combining them into a single verbal conversation leaves you without a clear record when the scope changes.
Before you start
- Gather your materials: your policy information, vehicle identification number, registration, accident details, photographs, and any claim reference already assigned. Preserve original dashcam footage separately from edited clips.
- Establish access and contacts: identify the vehicle owner, the insurer’s claim contact, and the repair center’s contact. If the vehicle is leased, financed, or company-owned, check who must approve repairs and handle payment documents.
- Preempt the authorization gap: ask what an inspection or disassembly authorization permits before signing. Authorization to inspect, insurer approval of an estimate, and your authorization to repair are different checkpoints; ask how towing, storage, and reassembly are handled if repairs do not proceed.
For your 2026 claim file, keep 1 claim folder containing documents and correspondence. Record 2 primary contacts—the claim handler and repair-center representative—so questions reach the person responsible for answering them. These are organization recommendations, not insurer requirements.
Accident documentation and claim intake
Secure the scene and preserve evidence
- Address immediate safety first. Move out of traffic when safe, seek emergency help for injuries or hazards, and follow instructions from emergency responders. Do not drive a vehicle with leaking fluids, deployed airbags, steering problems, or other signs that safe operation is uncertain.
- Record the accident facts. Exchange driver, vehicle, and insurance information. Write down the location, time, traffic conditions, witness contact details, and any report reference. Describe observations rather than deciding fault at the scene.
- Photograph context and damage. If safe, capture 4 vehicle corners, close-ups of damage, and wider views showing vehicle positions and road conditions. Add photographs of warning messages after the vehicle is safely stopped; do not operate your phone while driving.
- Preserve originals. Save unedited photographs, video, towing paperwork, and receipts. Keep a separate note explaining each document rather than renaming or editing away useful context.
Expected result: you have a factual accident record and a safe plan for moving or recovering the vehicle. You have not treated a photograph as proof that the vehicle is safe to drive.
Open the claim and identify the route
- Notify the appropriate insurer promptly. Use the reporting method shown in your policy documents or official insurer account. Provide accurate facts and distinguish what you saw from what you do not know.
- Record the claim reference. Ask who handles coverage, inspections, repair-estimate questions, and transportation questions. Keep the date and substance of each conversation in your claim folder.
- Clarify the claim route. Ask whether you are proceeding under your own applicable coverage or seeking payment from another driver’s insurer. Do not assume the other insurer has accepted liability because a claim number exists.
- Confirm transportation arrangements separately. Ask whether rental coverage applies, what conditions govern it, and what event ends authorization. A repair appointment does not establish rental coverage.
Expected result: you know which insurer is reviewing the loss, who owns the next decision, and what documents are outstanding.
Choose the claim route deliberately
The best route depends on available coverage and the insurer’s liability decision—not simply which company answered first. Use this comparison to frame questions, not to assume eligibility.
| Claim route | Best for | Advantage | Limitation |
|---|---|---|---|
| Your own applicable collision coverage | Owners seeking to proceed under their policy | Coverage review follows your policy relationship | Deductible provisions and coverage terms apply; recovery from another party is separate |
| Another driver’s liability insurer | Owners seeking payment from the allegedly responsible party | Payment can proceed after liability and covered damages are accepted | Liability review can delay a repair-payment decision |
Neither route replaces your authorization to the repair center. Ask the insurer to explain unresolved coverage questions before you commit to work that depends on claim payment.
Repair-center selection and authorization
Verify certification and arrange inspection
- Identify the vehicle precisely. Provide the make, model, model year, identification number, and relevant drivetrain information. Mention warning lights, glass damage, deployed restraints, and any changes in steering or braking after the collision.
- Verify the location’s qualification. Ask whether the specific repair center holds current factory certification applicable to your vehicle. Do not substitute a general statement about a repair group for confirmation about the location receiving your car.
- Explain the insurer’s inspection instructions. Share any request for photographs, an inspection appointment, or an initial estimate. Ask the repair center how its inspection fits that request.
- Define the initial authorization. Read the document before signing and retain a copy. Confirm whether you are approving inspection, disassembly, repairs, or a combination, and ask what happens if the vehicle is later treated as a total loss.
Expected result: the repair center has the correct vehicle and claim information, and you understand the work you have authorized.
For an electric or hybrid vehicle, include drivetrain-specific questions at intake rather than after disassembly. The collision repair guide for EV and hybrid vehicle owners provides a focused next step for that conversation.
Reconcile the estimate and repair plan
- Request an explanation of the scope. Ask which items are visible damage, which require further inspection, and which procedures depend on vehicle-specific manufacturer instructions.
- Separate required procedures from assumptions. Ask about structural measurements, corrosion protection, scans, alignment, and calibration where applicable. Not every collision requires every operation; the vehicle and damage determine the repair plan.
- Clarify parts descriptions. Ask the repair center to explain the proposed parts categories and any difference between its recommendation and the insurer’s estimate. Get unresolved differences documented before authorizing the affected work.
- Document responsibility. Ask what the insurer has approved, what remains under review, and what obligations your authorization creates. Resolve ambiguity in writing rather than relying on a verbal assurance that everything is covered.
Expected result: you understand the proposed repair scope, the unresolved items, and the authorization needed to move forward.
A useful 2026 checkpoint is a written status note identifying the current scope, the next decision, and who must make it. “Waiting for insurance” is not enough; ask which specific document or approval is missing.
Supplements, completion, and handover
Track additional damage and approval changes
- Request documentation of newly discovered damage. Ask for photographs and an explanation connecting the additional work to the collision repair. A supplement is a request to change the original estimate, not automatic insurer acceptance.
- Identify the next approval. Establish who submits the supplement, who reviews it, and whether your authorization must change. Ask which work can proceed while the disputed or additional items remain unresolved.
- Update transportation arrangements. Tell the claim contact when the repair schedule changes and ask whether rental authorization needs review. Do not assume a supplement automatically extends transportation benefits.
- Keep each estimate version. Preserve the initial estimate, supplements, insurer responses, and updated authorizations together. Label documents by date so the current version is easy to identify.
Expected result: additional work has a documented reason, a named decision-maker, and a clear authorization status.
Review completion before taking the vehicle
- Read the final repair record. Ask the repair center to explain completed operations and differences from the initial estimate. Request available documentation for applicable scans, measurements, alignment, or calibration.
- Inspect the vehicle together. Walk around the car with the repair-center representative. Check repaired areas, glass, panel operation, lighting, and any concerns you recorded at intake.
- Raise unresolved symptoms before departure. Report warning lights, unusual noises, leaks, or changes in steering and braking. Ask whether the vehicle is safe to operate and what follow-up is required; do not treat pickup as proof that every concern has been resolved.
- Confirm payment and follow-up paperwork. Understand any remaining payment obligation and obtain written information about applicable repair warranties. Ask who handles a concern discovered after collection.
Expected result: you leave with the repair record, an explanation of completed work, and a clear contact for follow-up—not just the keys.
Repeat the workflow whenever damage changes the scope
A claim does not always move in a straight line. When disassembly reveals additional collision damage, return to documentation, review, and authorization before treating the revised scope as settled.
Use this update sequence for your 2026 claim:
- Save the new photographs and revised estimate.
- Ask which additional operations the repair center recommends and why.
- Confirm what the insurer has accepted and what remains unresolved.
- Update your authorization where required, then confirm the next repair milestone.
The benefit is traceability; the drawback is another review checkpoint. Do not remove that checkpoint simply to preserve an earlier pickup expectation. Ask for an updated schedule tied to the actual outstanding decision.
Troubleshooting
The insurer’s estimate differs from the repair plan
Ask for an itemized explanation of the differences. Have the repair center identify the supporting inspection findings and applicable repair procedures, then ask the insurer for its response to those specific items. A general disagreement is harder to resolve than a documented question.
Repairs are waiting without a clear explanation
Ask whether the blocker is coverage, inspection, a supplement, parts, authorization, or a required repair operation. Request the responsible contact and the next action. Do not repeatedly call every party without identifying the actual dependency.
Rental authorization ends before pickup
Contact the claim handler before the stated authorization ends. Provide the repair center’s current status and ask for a written decision about any extension. Keep transportation arrangements separate from the repair center’s estimated completion date.
The vehicle is being considered a total loss
Pause decisions about additional repair work and clarify the authorization already in place. Ask the insurer about its evaluation and ask the repair center about vehicle release, storage, and any authorized work. A total-loss review changes the workflow; it is not permission to keep expanding repairs.
A warning light appears after collection
Stop driving if safe operation is uncertain and contact the repair center promptly. Document the warning and circumstances without clearing codes yourself. Ask how the concern will be inspected and whether towing is appropriate.
Customize your workflow
For 2026, adapt the claim file to how you use the vehicle. A company vehicle needs an identified authorization contact; a leased vehicle needs attention to applicable lease requirements; a work vehicle needs a separate transportation plan.
MB Collision Group provides collision repair, auto glass replacement, and insurance-claim assistance. The practical benefit is access to those services within the group; the limitation is that repair-center assistance does not replace the insurer’s coverage decision. Confirm the location and service fit before arranging vehicle delivery.
Plan your collision repair
Discuss collision repair and insurance-claim assistance with MB Collision Group.
FAQ
What is the car accident insurance claim repair process?
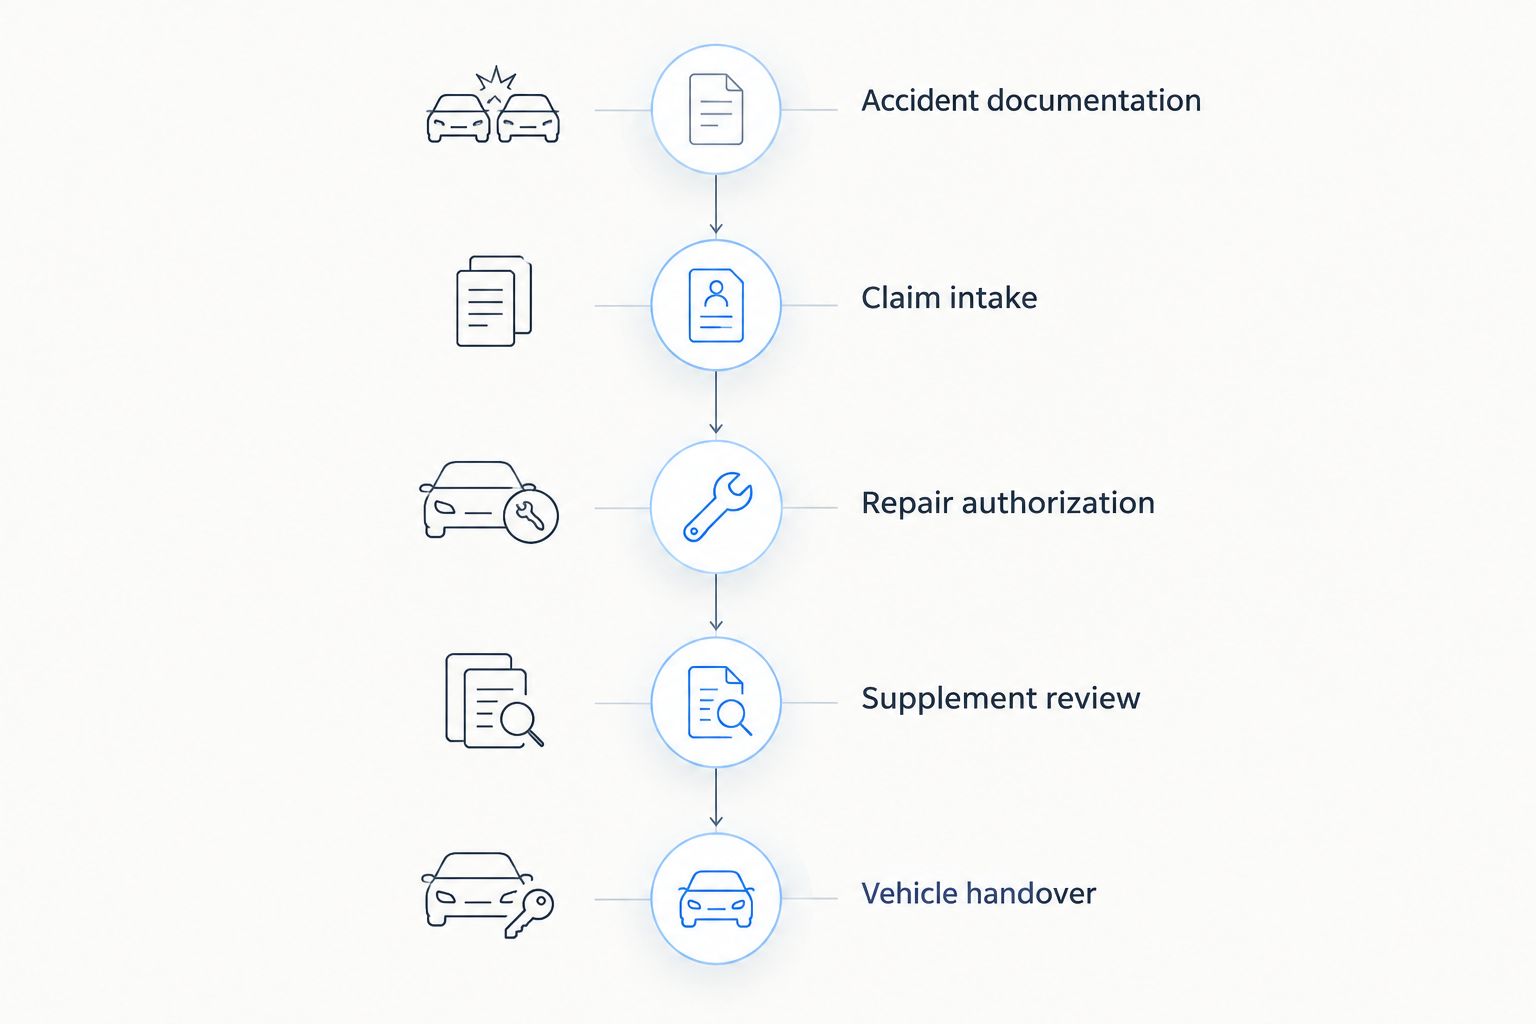
The process is to document the accident, report the claim, arrange inspection, authorize repairs, review supplements, and check the completed vehicle. Keep insurer coverage decisions separate from your authorization to the repair center.
Can I choose my own collision repair shop in California?
California drivers have the right to choose their repair shop. Your choice does not establish insurance coverage or settle disagreements about the repair scope, so confirm both separately.
Does factory certification mean my insurer will approve every repair?
No. Factory certification concerns the repair center’s qualifications, while the insurer evaluates coverage and payment under the applicable claim. Verify certification for your vehicle at the specific location.
Why did the repair estimate change after disassembly?
Disassembly can reveal collision damage that was not visible during the initial inspection. The repair center documents additional work in a supplement for review; that request is not automatic payment approval.
Do I have to use the other driver’s insurance?
You can ask your own insurer whether applicable coverage provides another claim route. The appropriate route depends on your policy, the facts of the accident, and the other insurer’s liability decision.
How long will my collision repair take in 2026?
Your repair schedule depends on the inspected damage, required procedures, parts, and outstanding approvals. Ask for a current milestone-based schedule rather than treating the first estimate as a guaranteed pickup date.
What documents should I get when I collect my repaired car?
Request the final repair record, applicable warranty information, and available documentation for relevant scans, measurements, alignment, or calibration. Ask the repair center to explain unresolved concerns before you drive away.
One last thing
Preserve the first estimate even after it becomes outdated. Comparing it with the final repair record explains what changed, why supplements were submitted, and which operations were ultimately completed. That document trail is more useful than a folder containing only the final invoice.